命令:犀牛,蚱Grass,ToGrasshopper
概述:可以使用Rhinoceros3D(又称“ Rhino”)和Grasshopper在THCAD中创建基于NURBS的参数化几何。要使用此集成,您将需要“ Rhinoceros 7”许可证或试用许可证,Grasshopper-THCAD Connection和THCAD BIM V21许可证或试用许可证。详细信息可在下面的“安装Rhino / Grasshopper连接”部分中找到。
Rhino创建了NURBS几何,Grasshopper添加了可编写脚本的参数控件,可以驱动该几何。工具的这种组合允许对CAD和BIM几何进行迭代的算法设计。
关于
Rhinoceros3D是由美国华盛顿西雅图的Robert McNeel&Associates开发的3D建模器。Rhino用于创建,编辑,分析,记录,渲染,设置动画和转换NURBS *曲线,曲面,实体,点云和多边形网格。Grasshopper是一种视觉编程语言环境,可在Rhinoceros 3D计算机辅助设计应用程序中运行。它与Rhino的3D建模工具紧密集成。
如何在Rhino中画一个盒子,再通过Grasshopper烘焙到THCAD
- 打开一个新的THCAD文件
- 保存文件
- 在THCAD中, 点击Grasshopper > Rhino
- 在Rhino命令行输入BOX来画个盒子。 (这和THCAD Box命令的作用一样。)
- 单击底部的第一个角。
- 单击以找到底座的另一个角。
- 单击以定义框的高度。

- 要打开一个新的Grasshopper脚本,请在Grasshopper环境中,单击Grasshopper> Grasshopper,然后单击File> New document。
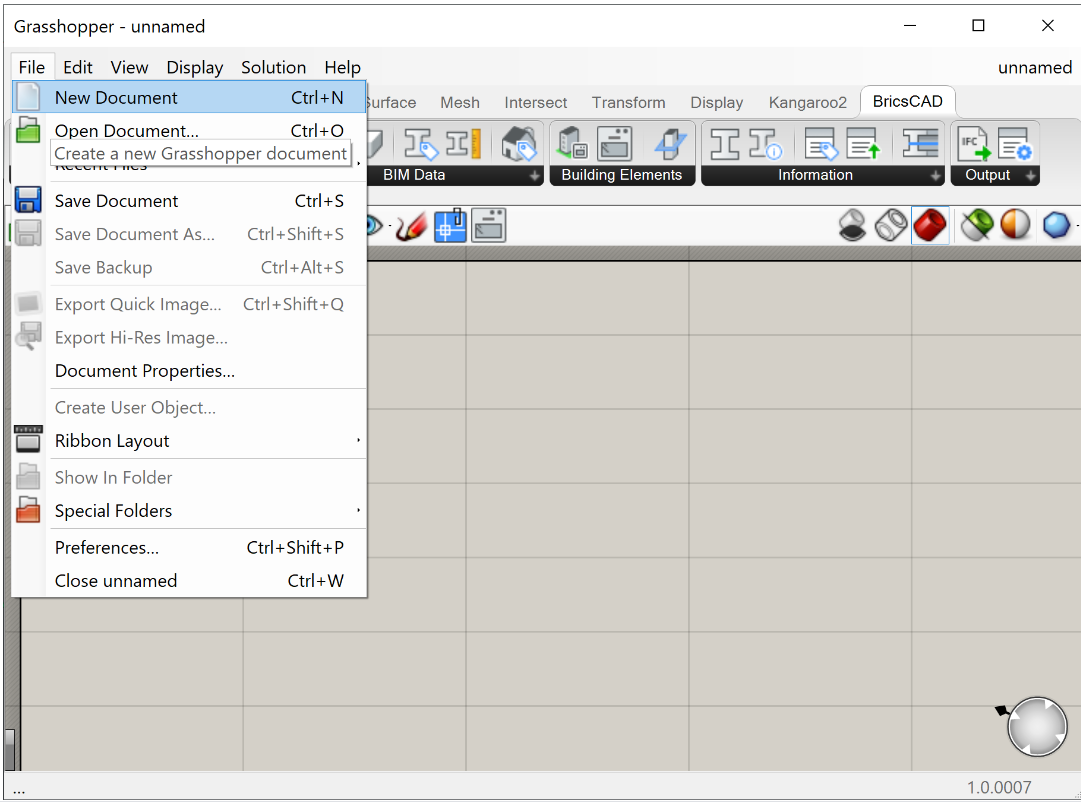
- 保存文件。
- 将Params> Geometry> Brep组件拖放到Grasshopper画布上。
- 右键单击该组件,然后选择“设置一个Brep”。
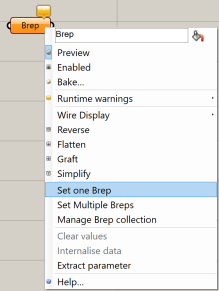
- 转到Rhino画布,然后选择您的多维数据集。
- Brep组件会将颜色从橙色变为灰色。如果关闭Rhino窗口并返回Grasshopper窗口,则立方体的预览将显示在THCAD模型空间中。
- 将THCAD>建筑元素>烘焙几何体组件拖放到Grasshopper画布上。
- 要链接这两个组件,请从Brep组件的右点单击并拖动到THCAD Bake组件的左点。
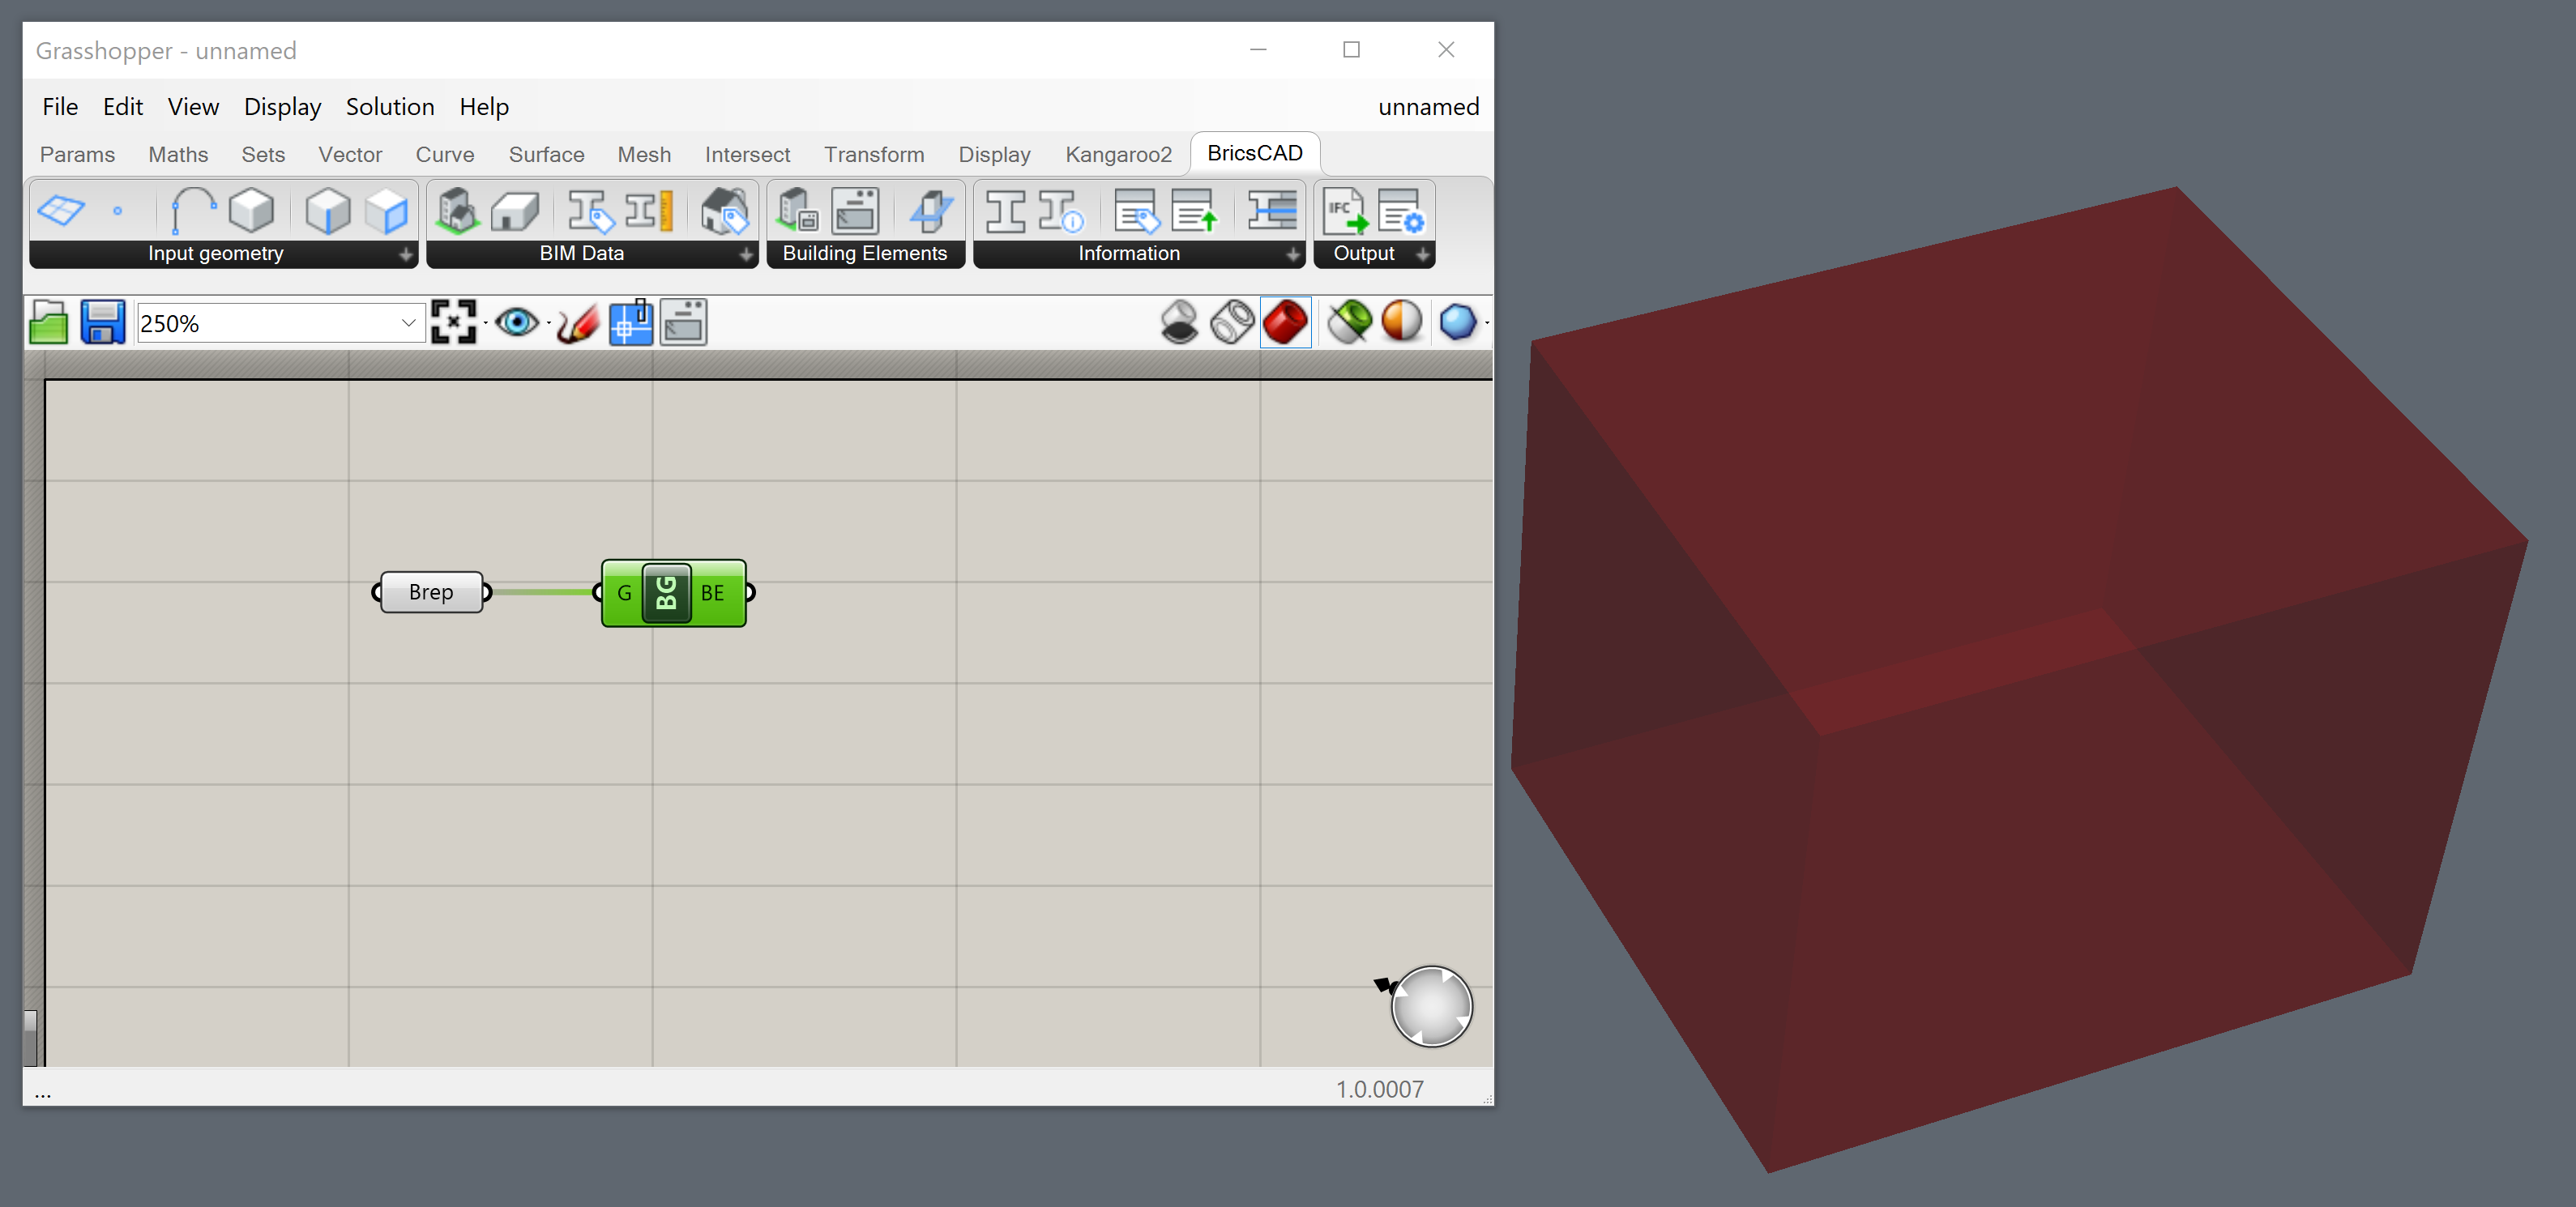
- 右键单击“烘焙几何体”组件,然后选择“烘焙到THCAD中”。
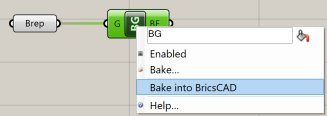
显示以下对话框。在这里,您可以选择目标图层,材质和颜色:
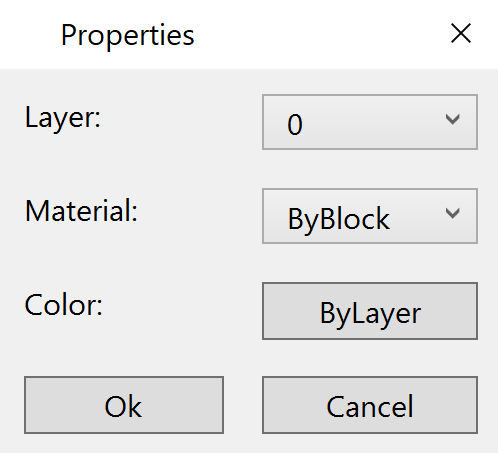
- 单击确定。将盒子作为固体烘烤到THCAD中。
如何从THCAD矩形在Grasshopper中绘制框
- 要打开新的Grasshopper脚本,请在Grasshopper环境中单击Grasshopper> Grasshopper,然后单击File> New document。保存文件。
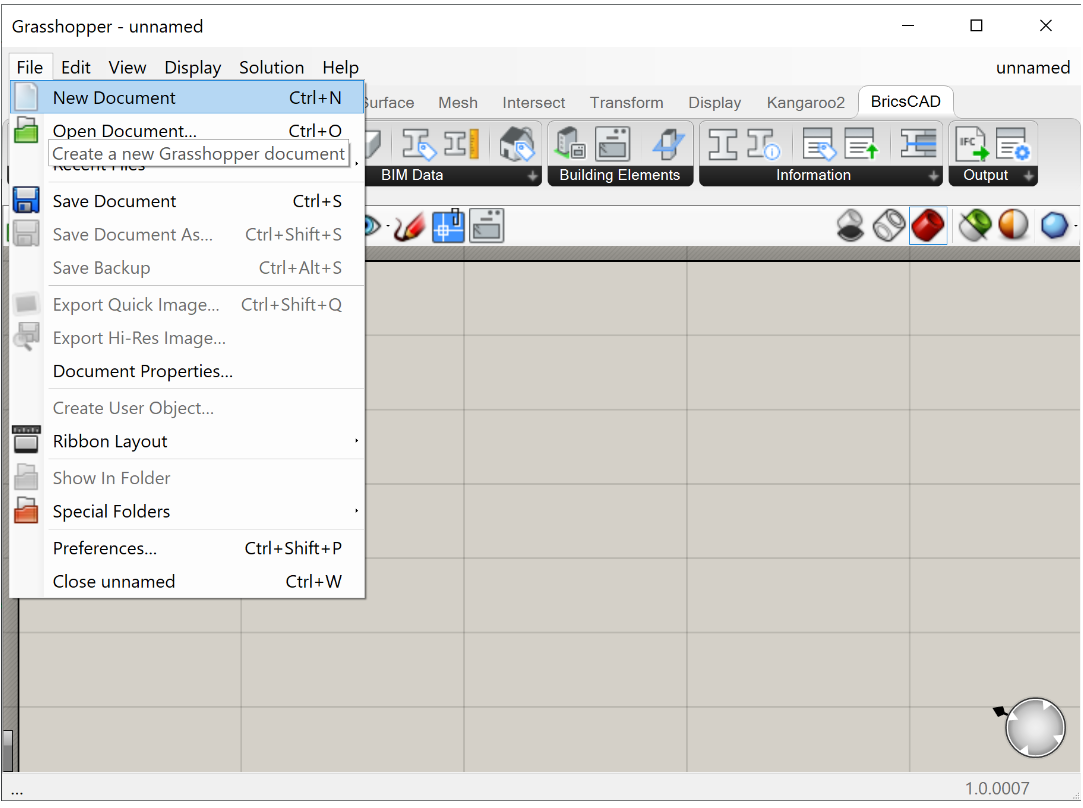
- 在仪表模板中打开一个新的THCAD文件并保存。
- 要将新脚本链接到打开的.dwg文件,请单击“画布工具栏”中的“链接”按钮。
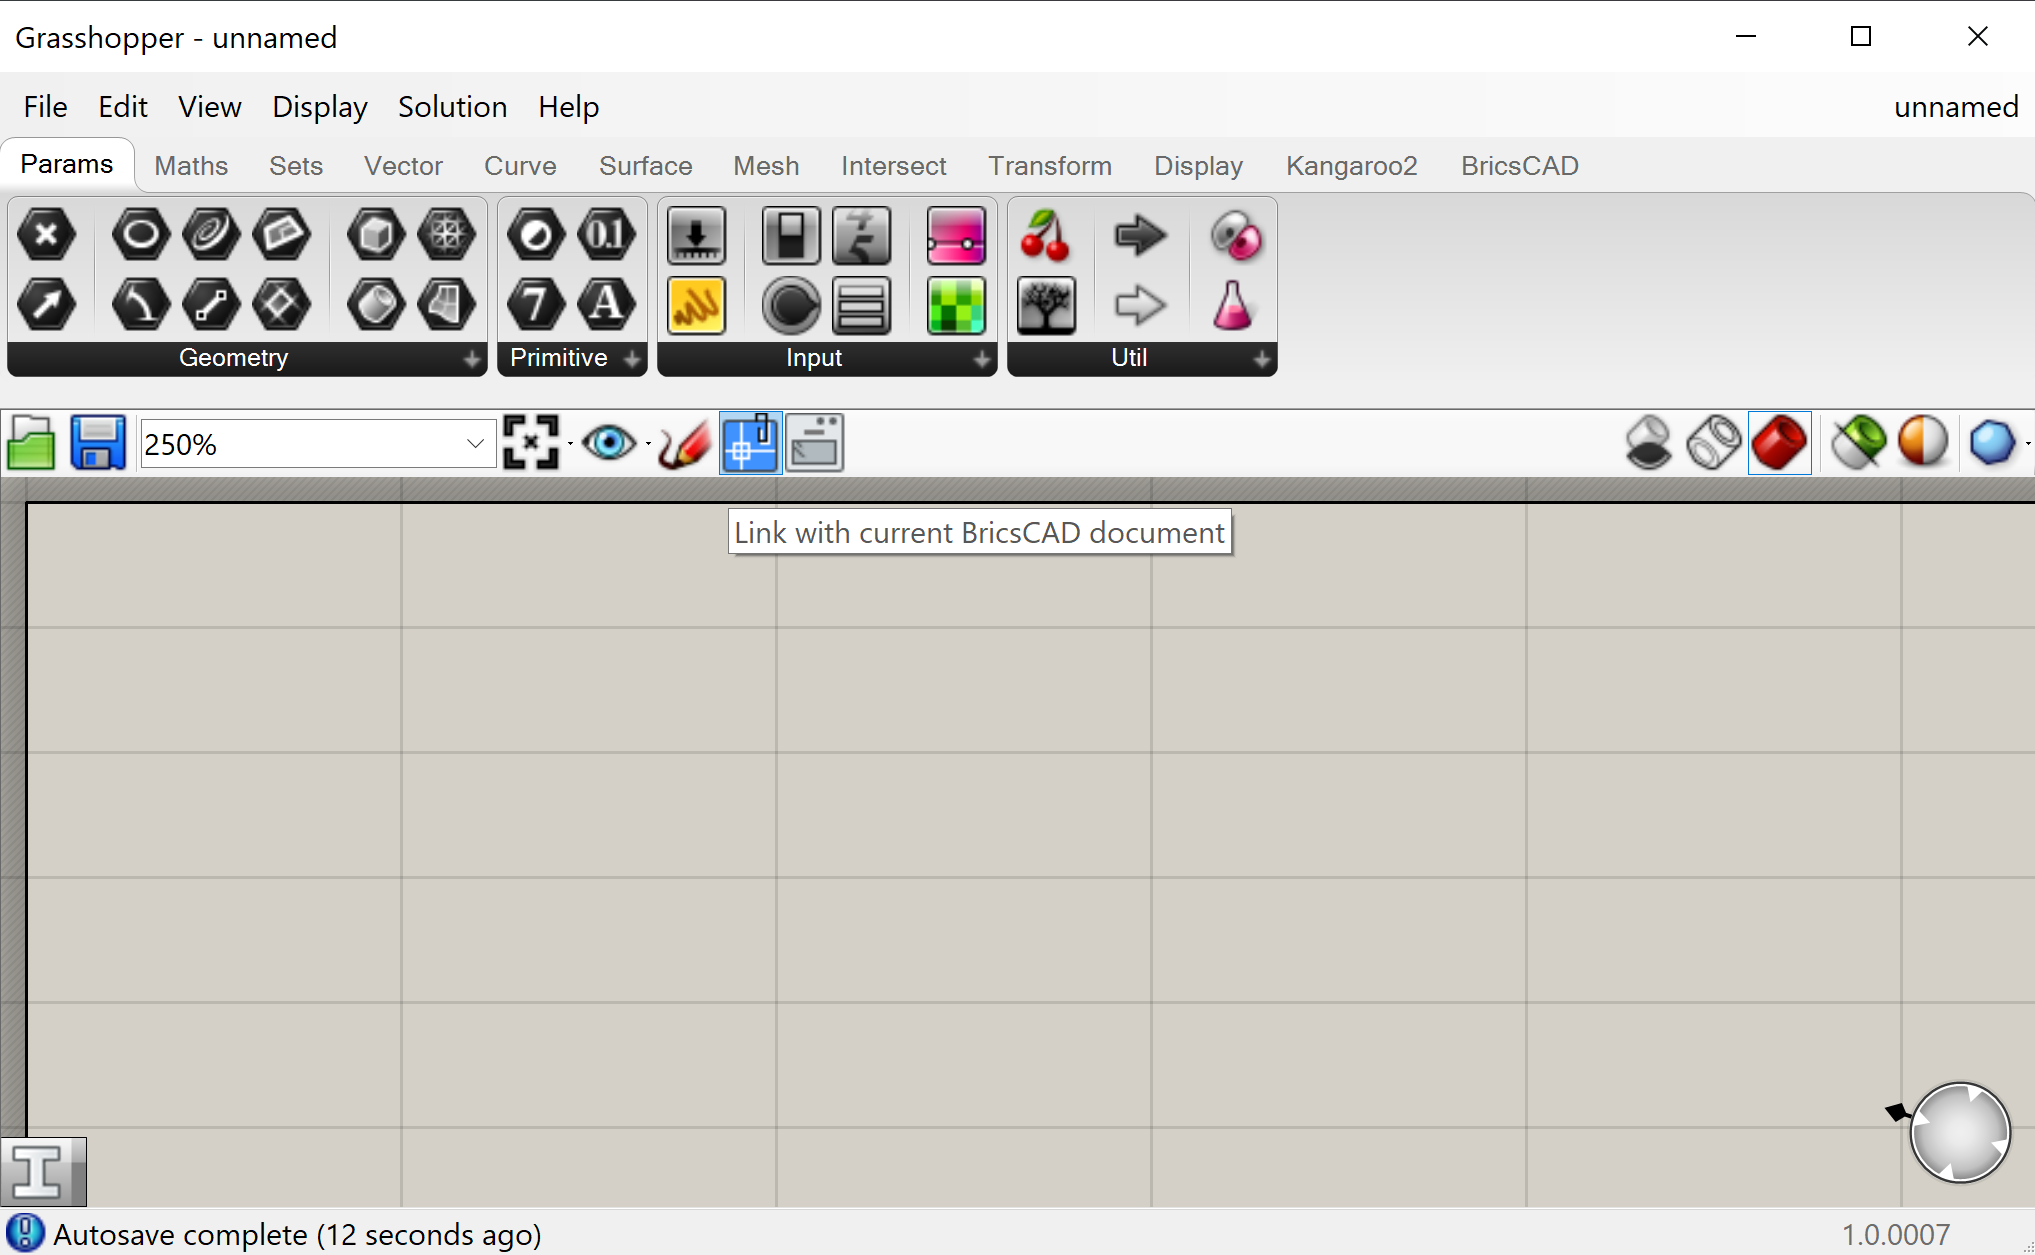
- 转到THCAD模型空间并绘制一个矩形。
注意:使用折线创建不规则几何形状。 - 将THCAD>输入几何>曲线组件拖放到Grasshopper画布上。
- 右键单击“曲线”组件,然后选择“设置一个THCAD曲线”。
- 转到THCAD模型空间,选择矩形
注意: 使用Quad节省时间:在THCAD中选择曲线,然后选择Quad中Grasshopper 页签下的ToGrasshopper。一个Grasshopper组件出现在Grasshopper 画布的左上角。 - Link the Curve component to a Surface > Freeform > Boundary Surfaces component
- Link this to a Surface > Freeform > Extrude component.
- In the Direction input of the Extrude component link a Vector > Vector > Unit Z component with Params > Input > Number Slider component. Set this to the height of your box, 17 for example. Note: you can edit the range and preciseness of the slider by right-clicking the component and selecting 'Edit...'. A dialog box pops up where you can set the digits and min and max value of the slider.

- You now have drawn a box in Grasshopper, using THCAD geometry as an input!
How to split up a box into different floors using Grasshopper
- Add the 'Start_1.ghx'-code to your previous Grasshopper script.
- You do that by downloading the zip file at the bottom of this page and extracting its content.
- Then open the 'Start_1.ghx' file by going to File > Open Document... in your Grasshopper window.
- You can now select all of the Grasshopper code by hitting Ctrl+A on the keyboard and copy it using Ctrl+C.
- Then switch back to the document you were working on in the previous procedure by going to the upper right corner of the Grasshopper window and clicking on the title of the current document (Start_1).
- You then get a drop-down of all the active Grasshopper scripts, so open the one you saved in 'How to draw a box in Grasshopper from a THCAD rectangle'.
- Now click on the canvas and hit Ctrl+V to paste the 'Start_1.ghx'-code.
- 右键单击以命名,将数字滑块从先前的过程重命名为“ Height building”。
- 将此数字滑块链接到“计算故事的数量”组中“分区”组件的输入A,以及“获取最后的墙高”组中“减法”组件的输入A。
- 将您的拉伸链接到“轮廓”组件的“形状”输入。

- 做一些文件清理:
- 将绿色的“输入”组拖到画布的前面。
- 通过选择组件,然后右键单击组并选择“添加到组”,将“高度构建”滑块添加到组中。
- 推迟边界和拉伸组件的预览:选择这些组件(按住Shift并单击它们),然后右键单击画布的空白区域,然后选择“关闭预览”。
- (可选)对于已经进行了这些更改的中间文件,请使用“ Intermediate_1.ghx”和“ Intermediate_1.dwg”。(位于此页面底部的zip文件中。)
- 您刚刚制作的脚本使您可以:
- 使用等高线组件,将每个平板高度的拉伸量除以。
- 通过壁的厚度使曲线偏移。
- 制作墙壁的底部表面(这些表面分为较低的地板壁和屋顶壁)。
- 计算最后的墙高度。
- 将表面挤出到屋顶,楼板和墙壁中。
- 使用绿色“输入”组中的滑块调整建筑物的高度,楼层的高度以及楼板和墙壁的厚度。
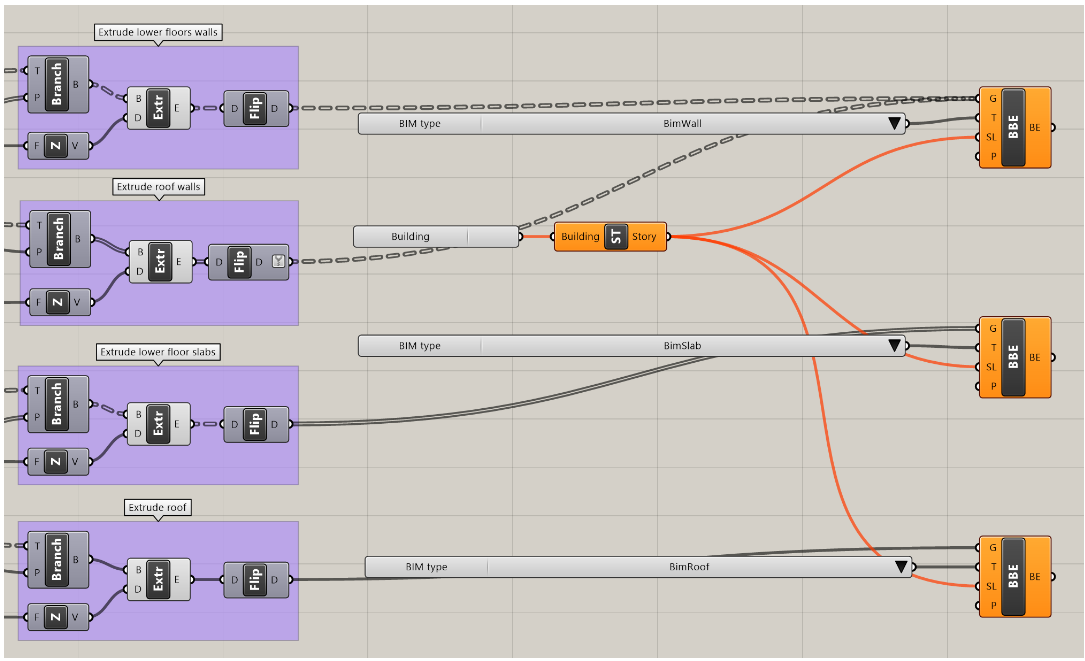
- 将3个THCAD>建筑元素>烘焙建筑元素组件添加到Grasshopper脚本的末尾。
- 将拉伸的元素(“翻转”组件)附加到“烘焙建筑元素”组件的“几何”输入节点上:
- 将凸出的下部地板墙和凸出的屋顶墙连接到一个“烘焙建筑元素”组件。(将多个节点连接到一个输入节点时,按住Shift键)。
- 将挤出的下层楼板连接到另一个“烘焙建筑元素”组件。
- 将挤出的屋顶连接到其余的Bake Building Element组件。
- 从THCAD> BIM数据类别中将以下组件添加到画布:1建筑物,1故事和3 BIM类型组件。
- 将建筑物附加到“故事”组件的“建筑物”输入,并将其附加到所有“烘焙建筑物元素”组件的“空间位置”输入。
- 将BIM类型(分别在选择菜单中分别设置为BimWall,BimSlab和BimRoof设置)连接到挤压墙,楼板和屋顶的Bake Building Element组件的Element Type输入。
- 将显示以下警告:“输入参数建筑物无法收集数据”。这是因为,当在THCAD工程图中未定义任何建筑物时,Grasshopper无法收集输入。
- 要确定空间位置,要检测组件,请转到THCAD,然后单击“主页”>“分类”>“空间位置”。
- 添加建筑物和一些故事(故事要比将建筑物划分成更多故事)。
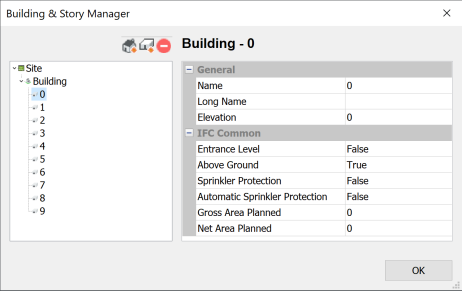
- 转到Grasshopper并右键单击Buildings组件,然后将其放置在“ Dropdown List”而不是“ Check List”中。

- 在下拉菜单中选择新建的建筑物。
- 按住Shift键选择所有“烘焙建筑元素”组件,然后从“画布”工具栏中选择“烘焙”选项。单击“确定”接受“图层”,“材质”和“颜色”。
- 现在,工程图将具有不同的楼层。
注意:检查属性以查看几何是否正确分类为“墙”,“平板”或“屋顶”。这些元素还将具有分配给它们的空间位置。

- 最后输入的几何图形将被烘焙到所有剩余的故事上,因为现在的故事数已超过几何图形。要更正此问题,请选择要分配的故事的正确子集。在THCAD中烘烤几何图形,故事将是正确的。不会烘焙任何“重复”的几何图形。
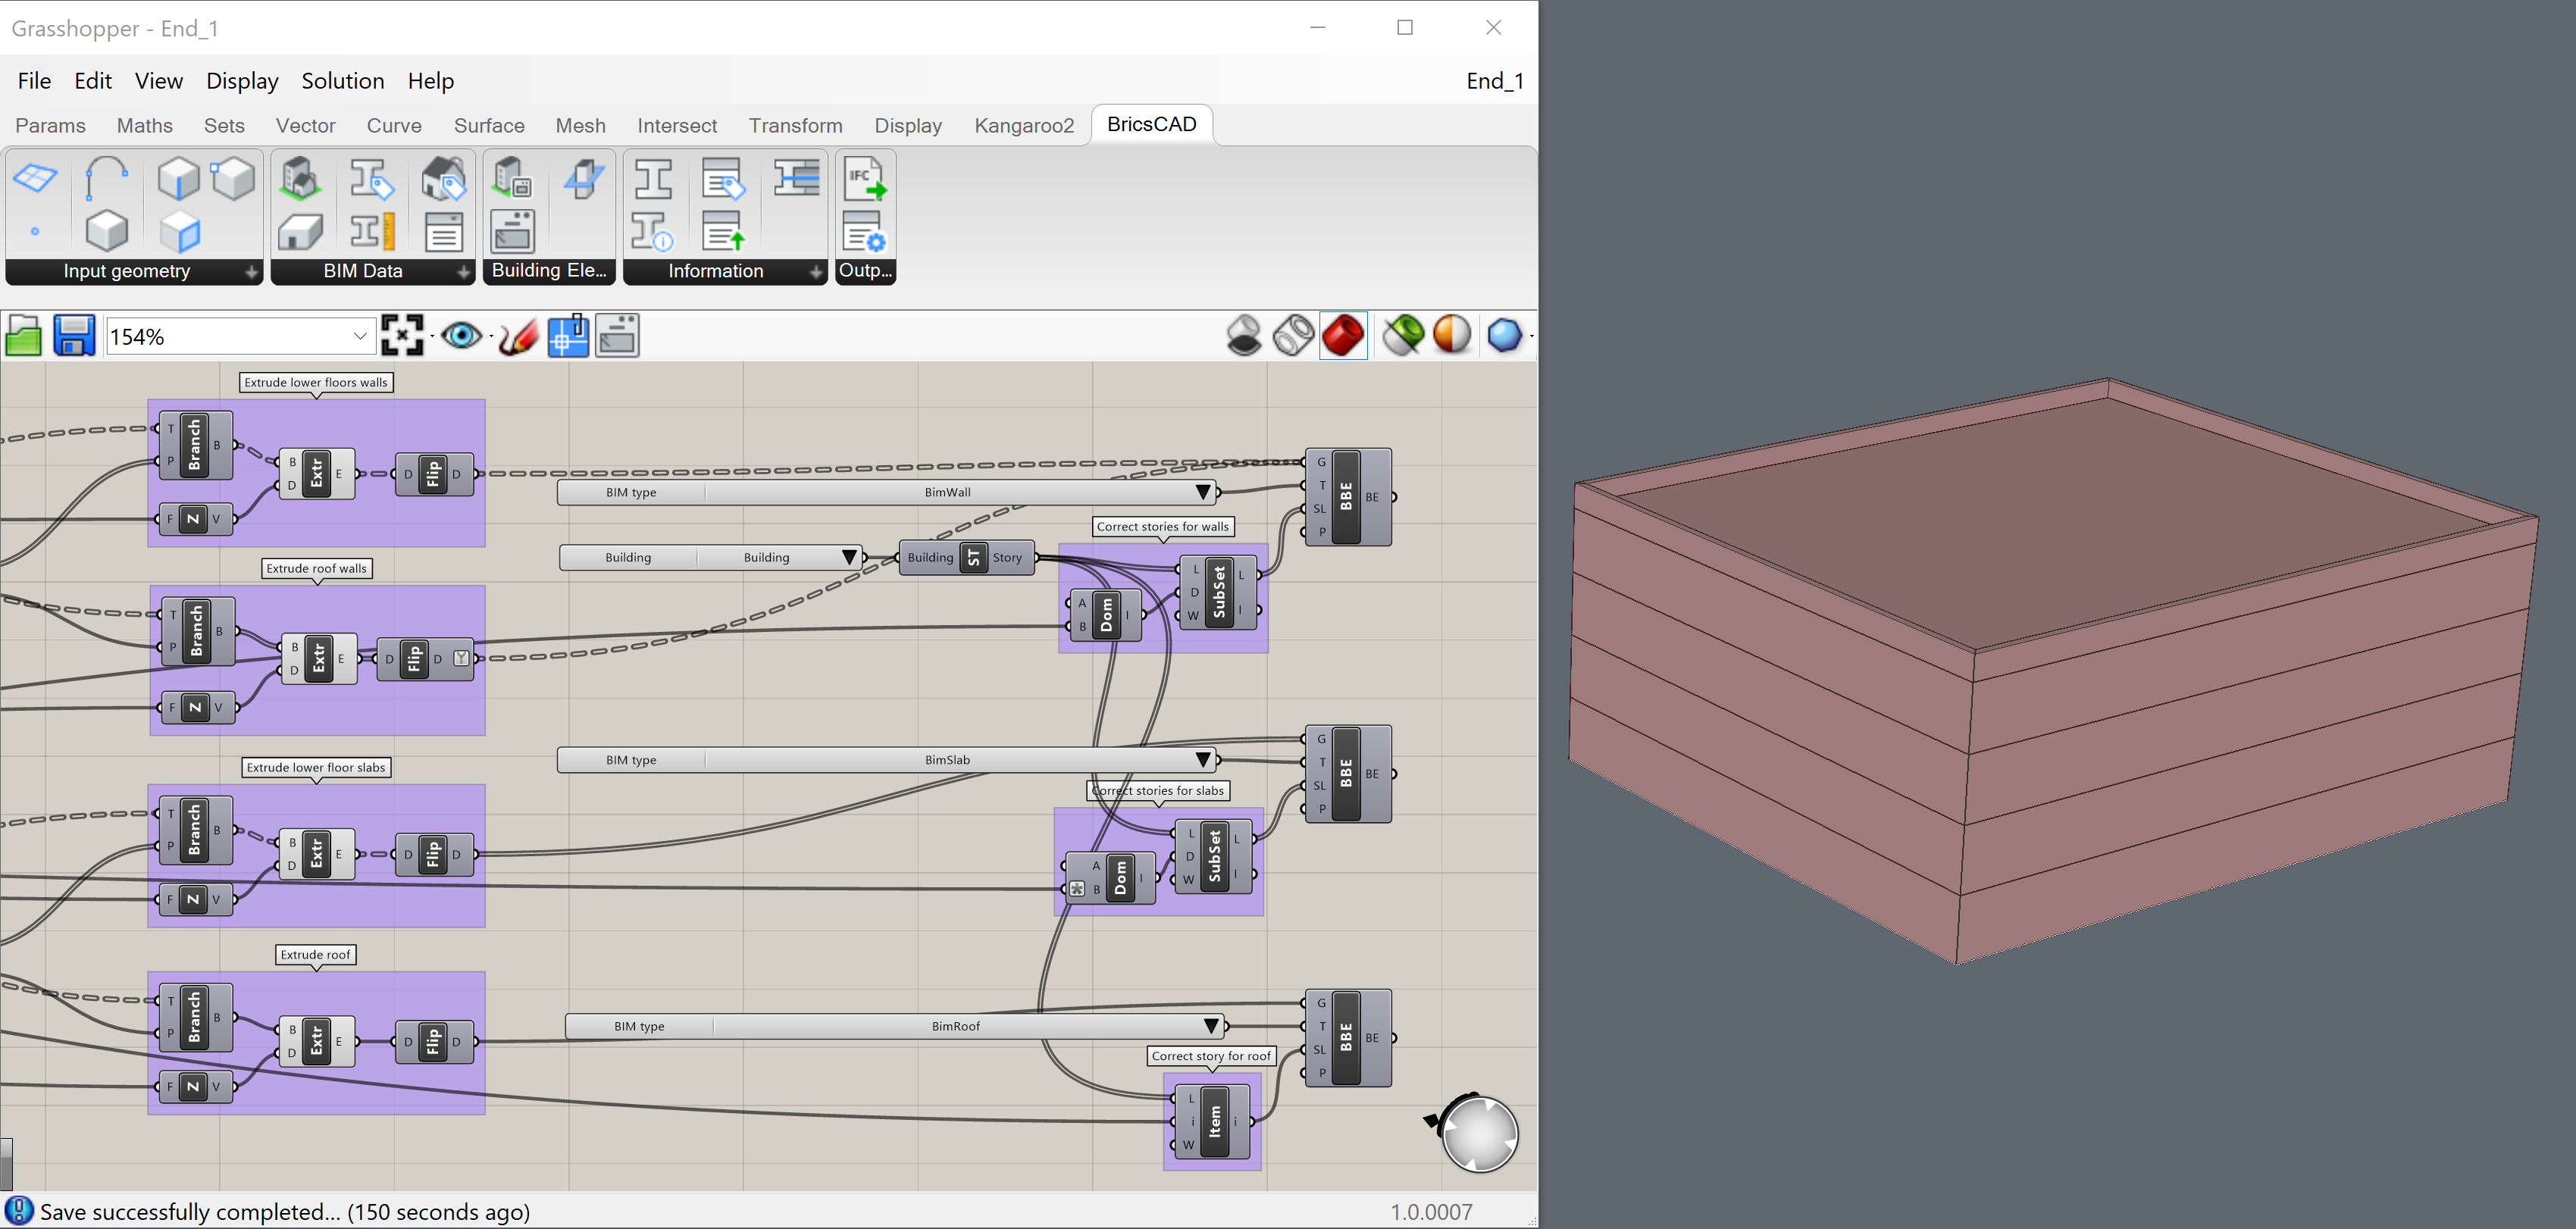
通过打开“ End_1.dwg”,然后打开链接到“ End_1.dwg”的Grasshopper文件“ End_1.ghx”,您可以看到它的完成情况。 - 您现在已经成功创建了建筑物!
如果要查看烘焙建筑物的结果,请检查文件“ End_1_Baked.dwg”或自行烘焙。
如何在建筑物顶部添加栏杆
我们将继续前面步骤中的建筑。因此,打开“ End_1.dwg”,然后打开链接到“ End_1.dwg”的Grasshopper文件“ End_1.ghx”。
- 将“ Start_2.ghx”代码添加到Grasshopper画布上。
- 为此,您可以下载此页面底部的zip文件并提取其内容。
- 然后,通过在Grasshopper窗口中转到“文件” >“打开文档...”,打开“ Start_2.ghx”文件。
- 现在,您可以通过按键盘上的Ctrl + A来选择所有Grasshopper代码,并使用Ctrl + C复制它。
- 然后转到Grasshopper窗口的右上角,然后单击当前文档的标题(Start_2),以切换回上一步中正在处理的文档。
- 然后,您会获得所有活动的Grasshopper脚本的下拉列表,因此请打开“ End_1.ghx ”。
- 现在单击画布,然后按Ctrl + V粘贴“ Start_2.ghx”代码。
- 将“拉伸屋顶”组的末端组件链接到“选择屋顶的顶面”组的“解构Brep”组件的Brep输入中。
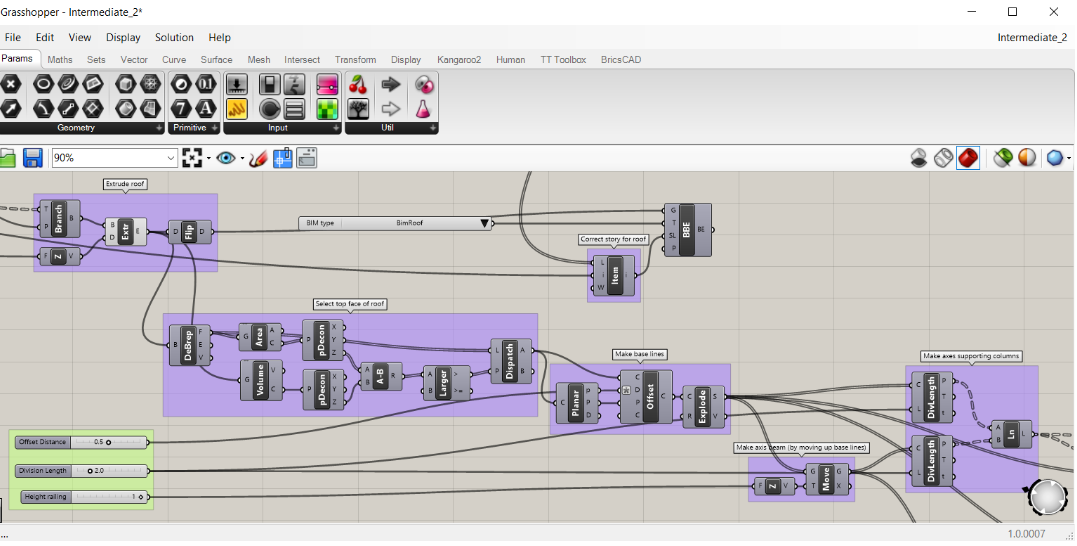
- 该脚本执行以下操作:
- “选择屋顶的顶面”组将选择屋顶的顶面。
- 剩下的脚本将采用该面孔并将其用作栏杆的基线。
- 我那么T将使得支撑立柱和横梁的轴。
- 它还将计算光束轮廓高度的一半。
- There is still a profile required, however, to complete this step and the following one. We will, therefore, create a profile from step 6 onward.
- With that profile and the axes, the beams and supporting columns are made as extrusions.
- The intermediate result is found in the 'Intermediate_2.ghx' and 'Intermediate_2.dwg' files. (Located in the zip file at the bottom of this page.)
- (Optional) Skip the 'Select top face of roof'-group and replace it with a THCAD > Input geometry > Face component. Set to the top face of the roof slab in your THCAD baked building. (Do this by right-clicking on the component, click on 'Set one THCAD face' and select the face in the THCAD drawing). Connect this Face component with a Params > Geometry > Surface component and connect this surface to the correct inputs.
- Go to THCAD > BIM Data.
Drag the Profile Names and the Profile Sizes components onto the canvas. - Select 'HEA' from the dropdown in Profile Names. This dropdown displays all the names of the profiles in the Profile Library of THCAD.
- Link the component to the input ProfileName of the Profile Sizes component.

- Link the Profile Sizes component to the input node 'List' in a Sets > List > List Item component, where i is set to '4' (right-click on the i input and 'Set integer' to 4). This List Item lets you pick one size from the list with all available profile sizes for the Profile Name linked to it.
Note: If you link a Params > Input > Panel component to the Profile Sizes output, you will see that the index 4 stands for size 160.

Link the Profile Names and List Item components to the THCAD > Information > Library Profile component, to get an HEA 160 profile as an output.

- To get the curves that make up this profile, attach a THCAD > Information > Profile Info component to the Library Profile. One of the outputs created is the Profile Curves as tree.
- Attach a Surface > Freeform > Boundary Surfaces component to the Profile Curves output node. This is to later extrude the surface as a solid, instead of the lines as a surface.

- To group together the components just created, select them (with a selection box) and right-click on 'Group'.
- (Optional) To rename the group, right-click on the purple rectangle. Rename the group in the upper text box, e.g. to 'Make profile'.

- The Boundary Surfaces component should now be linked to the Content input of the Bounding Box component of the 'Calculate half of height of beam'-group. The Boundary Surfaces component should also be linked to the two Profile inputs of the Extrude components in the groups 'Make supporting columns' and 'Make beams'. The extrusions should now show you a railing with HEA 160 beams and columns.
- To bake those beams and columns into THCAD attach two THCAD > Building Elements > Bake Building Element components to the Grasshopper canvas.
- 758pxDo the following:
- Set the Geometry input to the extrusions.
- Set the Element Type input to a THCAD > BIM Data > BIM Types component, which is set to BimColumn for the column extrusions and to BimBeam for the beam extrusions.
- Set the Spatial Location input to the same as the roof.
- Set the Profiles input to the Library Profiles component from the 'Make profile'-group.
- You now successfully created a railing on top of your building. (The full script to do this is in the 'End_2.ghx' file at the bottom of this page, which is linked to the 'End_2.dwg'.)
- Bake into THCAD. The profiles are now set to the one in the Grasshopper script. You can still modify the connections of the beams in the corners by using L-Connect in THCAD. (To see the finished building with the railing on top of it, check out the 'End_2_baked.dwg' file at the bottom of this page.)
Procedure: Add information to a baked model
We will continue with the building made in the previous procedure. So open the 'End_2.dwg' and then open the Grasshopper file 'End_2.ghx' that is linked to the 'End_2.dwg'.
- Add the 'Start_3.ghx' code to the canvas.
- You do that by downloading the zip file at the bottom of this page and extracting its content.
- Then open the 'Start_3.ghx' file by going to File > Open Document... in your Grasshopper window.
- You can now select all of the Grasshopper code by hitting Ctrl+A on the keyboard and copy it using Ctrl+C.
- Then switch back to the document you were working on in the previous procedure by going to the upper right corner of the Grasshopper window and clicking on the title of the current document (Start_3).
- You then get a drop-down of all the active Grasshopper scripts, so open 'End_2.ghx'.
- Now click on the canvas and hit Ctrl+V to paste the 'Start_3.ghx'-code.
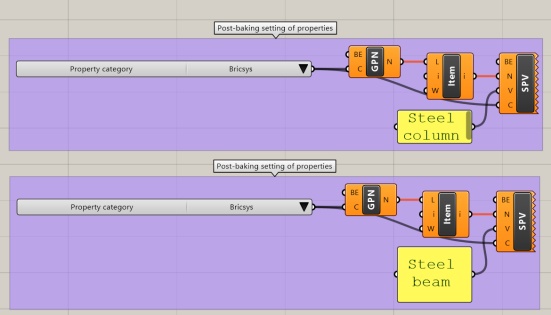
- This code has some post-baking settings of classified and baked beams and columns:
- The script uses the Get Properties Names component to display the BIM properties in the Property Category '.
- In those properties, it selects item 1 for the columns and item 0 for the beams, 'ColumnType' and 'BeamType' respectively.
- To conclude, it sets the properties to the value specified in the Panel components, using the Set Property Value components.
- To make the script work, bake the two Bake Building Element components that make up the railing.
- Now link the Building Element output of the Bake Building Element components to the respective Building Element input of the Get Properties Names components.
- 同样,将“烘焙建筑元素”组件的“建筑元素”输出链接到“设置属性值”组件的相应“建筑元素”输入。
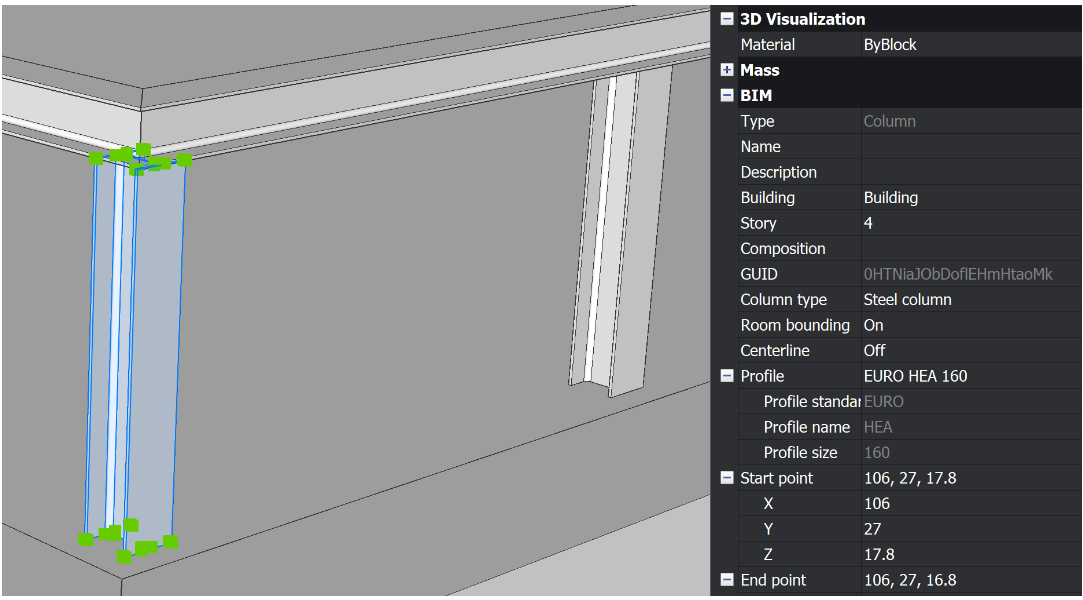
- 如果现在在THCAD中选择一列并打开其属性,则ColumnType将设置为“钢柱”。当您更改面板组件的值时,THCAD中的属性会实时更改。
- 结果脚本:“ End_3.ghx”可在此页面底部的zip文件中找到。它可以与“ End_3.dwg”文件一起使用,在该文件中没有任何内容。烘焙所有建筑元素,以获取烘焙后设置。
Grasshopper中的THCAD工具集
图标 | 姓名 | 描述 |
| 飞机 | 在THCAD中表示飞机。 |
| 观点 | 表示THCAD中的一个点。 |
| 曲线 | 表示THCAD曲线。 |
| 实体 | 代表THCAD实体。 |
| 边缘 | 表示THCAD边。 |
| 脸 | 表示THCAD面。 |
| 顶点 | 表示THCAD顶点。 |
| 建筑物 | 为THCAD中“空间位置”中存在的所有建筑物提供名称选择器。 |
| 故事 | 返回附加到输入建筑物的所有故事。 |
| 个人资料名称 | 为THCAD的“个人档案”中存在的所有个人档案提供名称选择器。 |
| 轮廓尺寸 | 返回附加到输入配置文件的所有尺寸。 |
| BIM类型 | 为THCAD中可用的所有BIM类型提供类型选择器。 |
| 物业类别 | 为THCAD中可用的所有属性类别提供类别选择器。 |
| 烘焙几何 | 将Grasshopper几何图形烘焙到当前的THCAD工程图中,而不考虑附加到它的BIM数据。“烘焙几何体”的输出是对没有BIM数据的烘焙建筑元素的引用。 |
| 烘烤建筑元素 | 将Grasshopper几何体烘焙到当前的THCAD工程图中,同时向其添加BIM数据。“烘焙建筑元素”的输出是对具有BIM数据的烘焙建筑元素的引用。 |
| 空间位置要素 | 默认情况下,返回THCAD中存在的所有建筑元素。使用输入参数时,返回按元素类型和/或空间位置过滤的建筑元素 |
| 图书馆简介 | 根据给定的名称和大小,从库中返回一个配置文件。 |
| 个人资料信息 | 返回指定轮廓的信息(名称,尺寸,标准和曲线)。 |
| 物业名称 | 返回指定属性类别中附加到建筑元素的属性名称。 |
| 适当的价值 | 返回指定属性名称和类别的属性值,该属性值附加在建筑元素上。 |
| 线性实体信息 | 返回有关THCAD工程图中存在的线性实体的信息(轴,挤出路径和轮廓曲线)。 |
| 设置属性 | 根据指定的名称,类别和值设置建筑元素的属性值。 |
| 国际金融公司出口 | 将指定的建筑元素导出到IFC。 |
|
|
|
| 关联 | 将Grasshopper脚本链接到打开的THCAD .dwg文件。 |
| 烤 | 从选定的“烘焙几何体”和“烘焙建筑元素”组件烘焙几何体。 |


